How to Enable and Configure Spelling Check in Xliff Editor

Xliff Editor can be configured to underline mistakes like Word
Recent posts in this blog described how to enable check spelling with Microsoft Word spelling engine in the following programs:
- Word itself (sometimes you have to enable spelling check manually)
- Trados Studio
- memoQ
- Wordfast
- Passolo
- Browsers (Chrome or Firefox)
Now we shall talk about Xliff Editor. This CAT is a part of the Translation Workspace system, and it works with usual “offline” files by connecting to online resources (translation memory, termbases, etc.). The standard file extension of Xliff Editor file is .xlz.
By default, spelling check “on the go” is not enabled in Xliff Editor. To enable and adjust it, please do the following:
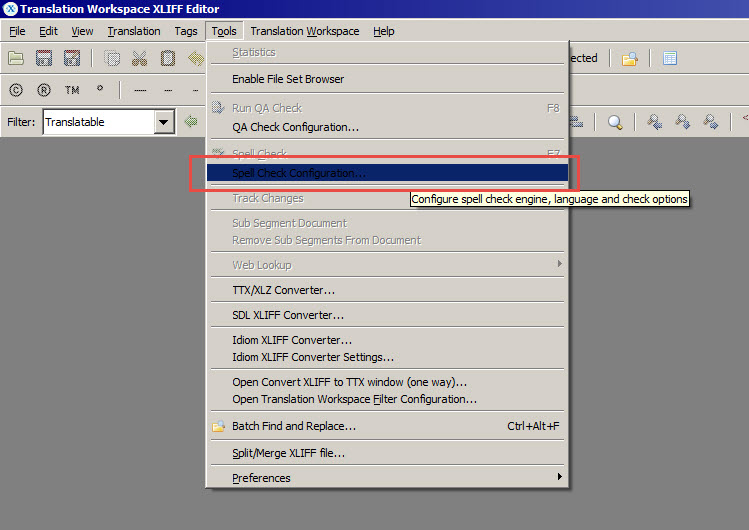
In Xliff Editor, select Tools > Spelling Check Configuration...

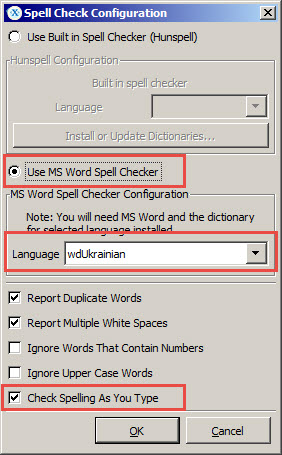
Spell Check Configuration dialog window opens. There, select the Use MS Word Spell Checker check box. Then, choose the language in the Language list. If you want to underline words with mistakes immediately as they are typed, set the Check Spelling As You Type check box.

After that, restart Xliff Editor. All erroneous words are now underlined with red lines, like in Word.


