How to Insert a Tab Character in a Word Table

Most Microsoft Word users know that the Tab key creates an indent in the text. When you place the cursor in a regular paragraph and press Tab, the program inserts a tab character — a hidden formatting mark that helps align text precisely. This basic but powerful Word formatting tool allows you to create structured lists, align columns, and control the layout of text down to the millimeter.
However, if you try to use Tab inside a table, Word behaves differently. Instead of inserting a tab, it moves the cursor to the next cell. Why does this happen — and how can you insert a tab in a Word table when you actually need one?
Default tab key behavior in Word tables
In normal text, pressing Tab inserts a tab stop (you can see it if you turn on hidden formatting marks using Ctrl + Shift + 8). But inside a table, Microsoft Word interprets the Tab key as a navigation command rather than a formatting one.
Here’s what happens by default:
- Tab moves the cursor forward to the next cell;
- Shift + Tab moves backward to the previous cell;
- If you’re in the last cell of the table, pressing Tab creates a new row.
This logic is convenient for data entry, as Word behaves similarly to Excel. Still, sometimes you actually need to insert a tab stop in Microsoft Word inside a table cell — for instance, when aligning numbers or text fragments horizontally.
How to Insert a Tab Character in a Cell
The solution is simple: press Ctrl + Tab.
This combination tells Word to insert a tab character inside a cell rather than jumping to another one. It’s the standard method when you want to insert a tab in Word while working within tables.
For example, imagine you have one column that contains multiple elements — such as dates, names, or values — and you want them aligned neatly. Here’s how:
- Place the cursor in the desired cell
- Press Ctrl + Tab where you want the indentation
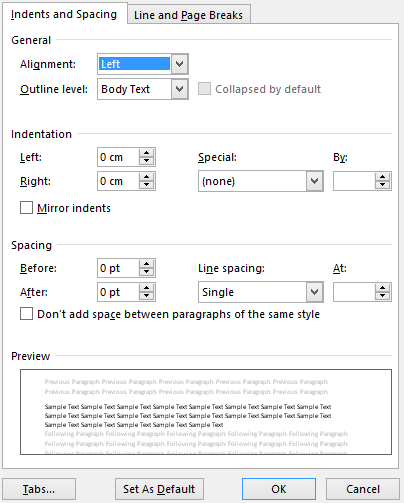
- If necessary, set tab positions manually in the Home → Paragraph → Tabs...
The same method works in PowerPoint, since its tables share Word’s text logic. However, note that Excel doesn’t support tabs at all: pressing Tab there always moves the cursor to the next cell.
How to Insert Multiple Tabs in a Single Cell
You can use several tab stops in one cell to align text precisely. Each tab stop in Microsoft Word moves the cursor to a predefined position, letting you structure information like in a mini-table.
To set tab stops in Word, follow these steps:
1. Select a cell or an entire row in your table
2. Open the Home menu, go to the Paragraph section

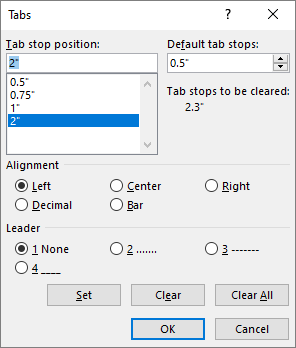
3. In the dialog box, click Tabs...

- Enter your desired tab positions (e.g.,2 cm, 4 cm, 6 cm)

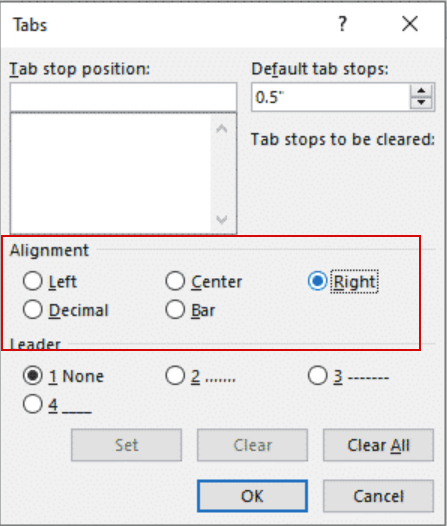
5. Choose the alignment type — left, center, right, or decimal

6. Click OK.
Now, each time you press Ctrl + Tab, the cursor jumps to the next defined position. This makes it easy to create complex text layouts inside a single table cell — especially useful for formatting structured data, such as forms or item lists.
Tips for working with tabs in Word tables
- Show hidden characters. It helps you visualize each tab character and spacing element.
- Use the Word ruler. You can quickly add or adjust a Word tab stop by clicking directly on the ruler.
- Combine tabs and indents. They work well together to achieve perfect alignment.
- Create templates. If you often use tables, set up Word templates with preset tab stops and indents.
- Check compatibility. In certain formats (like DOCX or PDF), tab positions may shift if your table has custom column widths.
Using tabs in Word tables is a small but powerful formatting technique. Knowing how to insert a tab stop in Word and how to use tab in Word tables helps you maintain a clean, professional layout. Whether you need to format data, align multiple elements, or design structured content, mastering Microsoft Word tab stops ensures your documents look polished and precise.
Previously, we also talked about how to convert a table to text in Microsoft Word and even select a rectangular fragment, e.g., to remove bullets.


